
Microarray Scanner: How It Detects Fluorescence, PMT vs. CCD, Parts, and How to Choose One

On this page
A microarray scanner is the instrument that reads a DNA microarray. After a microarray chip has been hybridized with fluorescently labeled sample, the scanner illuminates each spot, measures the fluorescent light it emits, and turns those measurements into a digital image and intensity values for every spot. Those intensities are what reveal which genes were active in the sample.
A brief orientation, since the scanner only makes sense alongside the chip it reads. A DNA microarray is a slide or chip carrying thousands of tiny spots, each holding many copies of a known single-stranded DNA probe. Labeled sample DNA or cDNA is washed over the chip and binds only to the spots whose probes are complementary, a process called hybridization. The scanner then measures how much labeled sample bound at each spot. For the full microarray procedure, chip manufacture, sample labeling, and hybridization, see our article on DNA microarrays. This article focuses on the scanner: how it detects the signal, its parts, and how to choose one.
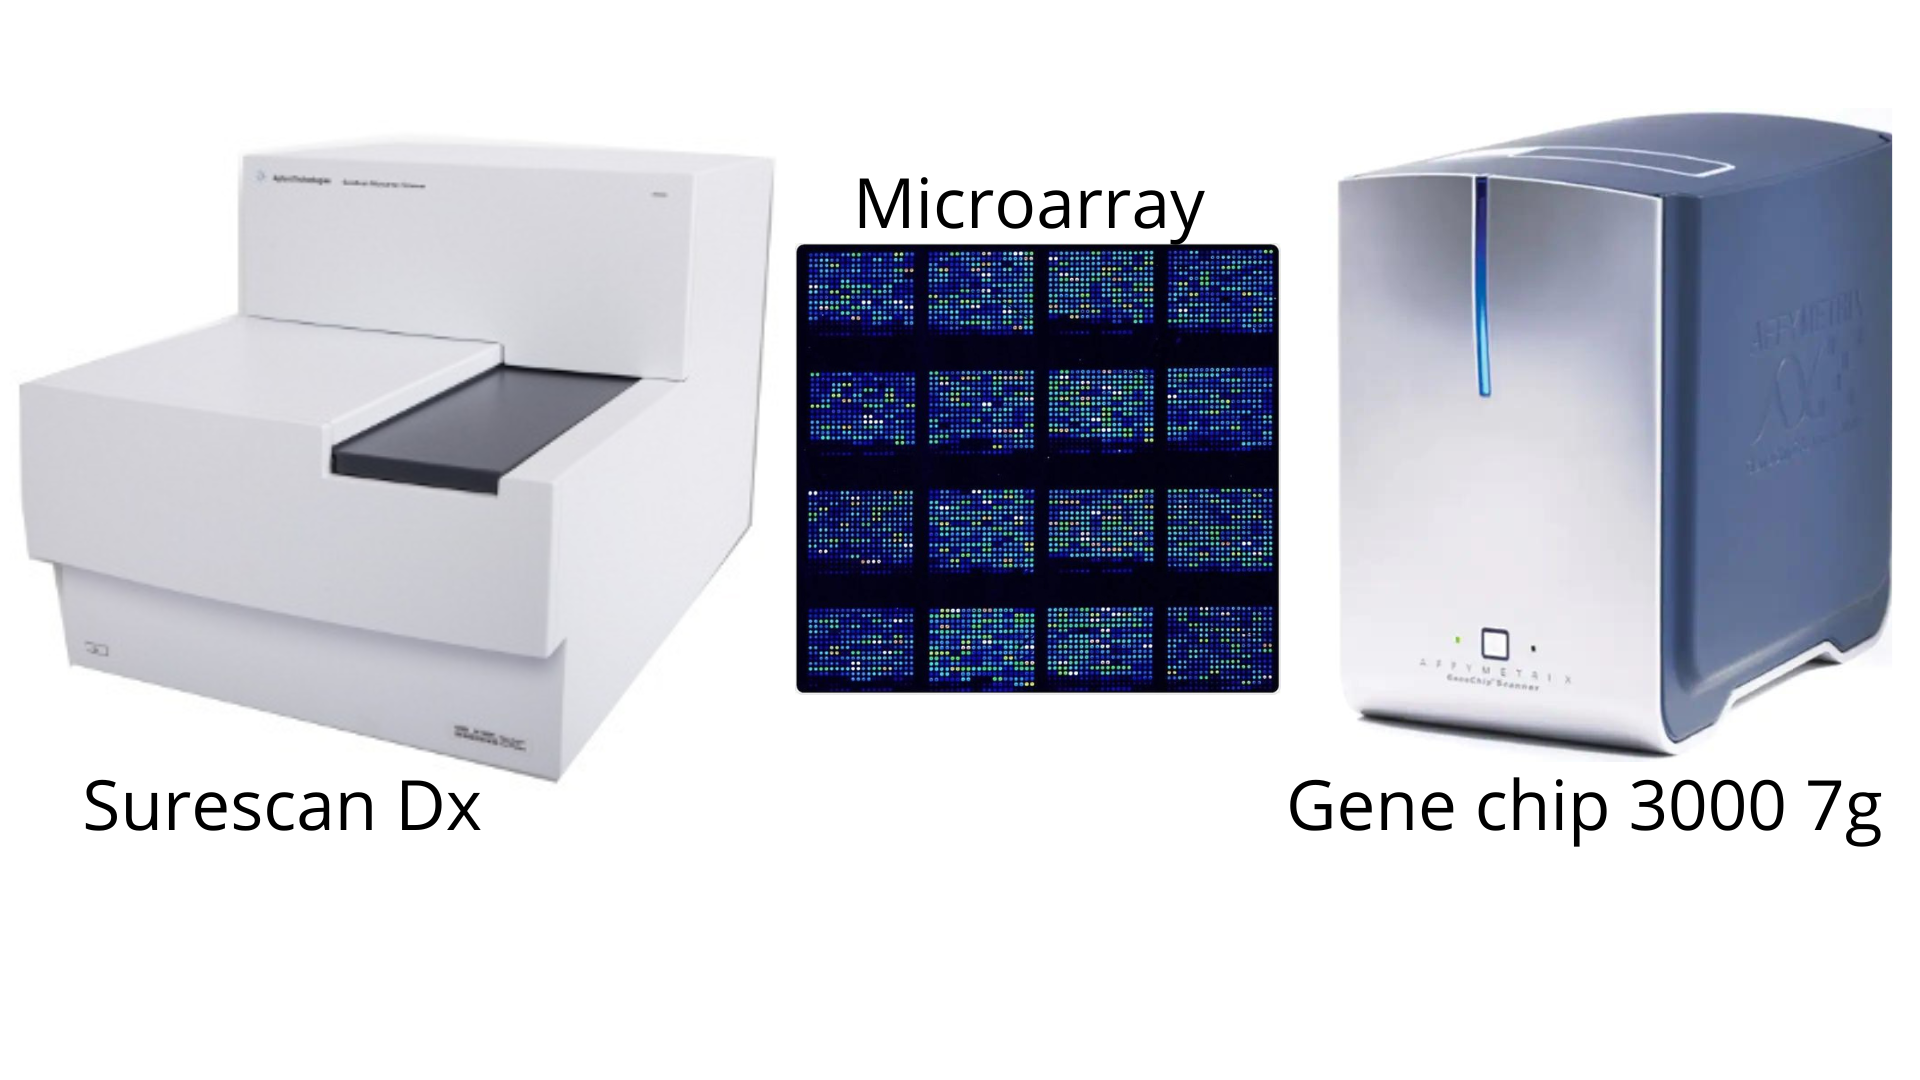 Figure: DNA Chip and microarray scannerImagecredit:https://www.news-medical.net/life-sciences/DNA-microarray.aspx.
Procedure of Microarray
The basic principle of DNA microarray is “nucleic acid hybridization.” Nucleic acid hybridization means joining two complementary DNA by hydrogen bonds to form a double-stranded molecule. The procedure of microarray has the following steps:
Preparation of DNA chip
There are many ways to prepare a microarray chip. The DNA chip was designed using photolithographic methods in the early days. Nowadays, photoactivated chemistry and masking help obtain DNA probes which are also available for purchase commercially. Also another commercially available way is an already designed probe attached to a fine needle printed on a chemical matrix surface by a robot.
Nucleic acid hybridization
For hybridizing the nucleic acid, the following steps are performed:
- Sample collection: Two samples of healthy as well as infected tissue for comparison are preferred.
- Isolating RNA (ribonucleic acid): Isolate mRNA from the collected sample using the column or solvent method.
- Labeled cDNA preparation: Prepare labeled cDNA (complementary DNA) from the isolated RNAs. Labeling is done by using fluorescent dyes like Cy3 and Cy5.
- Hybridization: Now, place the prepared, labeled cDNAs into the DNA chips/microarray trays with the required probe for hybridization.
Analysis of DNA chip
A microarray scanner helps collect the data of thus hybridized chip/microarray tray after the tray is rinsed thoroughly to remove the unbound/unhybridized DNAs. The intensity of the color is measured, and the difference helps analyze the genes.
Principle of Microarray Scanner
A microarray scanner works by fluorescence detection, and every scanner does three things: excite the dye, collect the light it emits, and convert that light into numbers.
Excitation. A laser (or in some instruments an LED) shines light of a specific wavelength onto the chip. Each fluorescent dye absorbs at its own wavelength, Cy3 is excited by green light, Cy5 by red, so a scanner with two lasers can read a two-color experiment by exciting each dye in turn.
Emission and collection. The excited dye emits light at a longer wavelength than the excitation light. Optical filters let this emitted light through while blocking the much stronger reflected excitation light, so the detector sees only the fluorescence. This separation of emitted from excitation light is the core optical trick of the instrument.
Detection and digitization. The collected light is turned into an electrical signal and then into a numerical intensity value for each spot. The scanner builds a digital image of the whole chip, and analysis software measures the intensity of every spot, subtracts local background, and (in a two-color experiment) computes the ratio between the two dyes. That ratio is what tells you whether a gene was more active in one sample than the other.
PMT laser scanner vs. CCD imager
Microarray scanners come in two detection architectures, and the difference is the most important thing to understand about the instrument.
PMT laser scanners (confocal). A laser beam is focused to a tiny spot and scanned across the chip point by point, like reading a page one pixel at a time. The emitted light from each point is measured by a photomultiplier tube (PMT), a detector that amplifies very weak light into a measurable signal. Confocal optics reject out-of-focus light, giving sharp images and a wide dynamic range, so both very faint and very bright spots can be measured in one scan. The trade-off is speed: scanning point by point takes time.
CCD imagers (wide-field). Instead of scanning point by point, the whole chip (or a large area of it) is illuminated at once and imaged onto a CCD camera, the same kind of sensor in a digital camera, which captures all spots in a single exposure. This is faster and the optics are simpler, but wide-field illumination and a camera sensor typically give a narrower dynamic range than a confocal PMT scanner, so extremely faint and extremely bright spots on the same chip are harder to capture together.
The practical rule: PMT confocal scanners favor sensitivity and dynamic range; CCD imagers favor speed and simplicity. Which matters more depends on whether your spots are faint and varied in intensity (favor PMT) or you need to read many chips quickly (favor CCD).
Parts of Microarray Scanner
A microarray scanner has three functional parts:
- Light source: One or more lasers (or LEDs) that excite the fluorescent dyes. A two-color scanner has two, typically one for Cy3 (green) and one for Cy5 (red).
- Optics and detector: A set of lenses and filters that separate the emitted fluorescence from the excitation light, plus the detector that measures it. This is where the two architectures differ: a photomultiplier tube (PMT) in a confocal laser scanner, or a CCD camera in a wide-field imager (see above).
- Analysis software: The program that converts the captured image into intensity values, subtracts background, computes dye ratios, and links each spot to its gene. Without this step the raw image is just colored dots.
How to Choose a Microarray Scanner
The answer to choosing a microarray scanner fit for your laboratory is checking all the following requirements:
- Sensitivity: The microarray scanner’s sensitivity must be high to avoid any DNA analysis errors.
- Resolution: The scanner must resolve individual spots cleanly. Resolution is set by the scanner's pixel size (how small a feature it can distinguish); finer resolution matters most for high-density chips with tightly packed spots.
- Detection architecture and dynamic range: Decide between a PMT confocal scanner (higher sensitivity and dynamic range, better for faint or highly variable spots) and a CCD imager (faster, simpler, good for high throughput). Dynamic range, the span between the faintest and brightest spot a scanner can measure in one scan, is often the deciding specification.
- Scan area: The scan area of microarray depends on the number of spots usually analyzed in your laboratory. Possibly a slightly larger area than the spots generally analyzed because the number of samples to analyze might increase in the future.
- Scanning speed: The scanning speed highly determines the correct microarray scanner for your laboratory. You should prefer a microarray scanner with the highest scanning speed because it determines the speed to completion of the microarray process.
- Other considerations: Other considerations like how easy is it to use, do you require multiple laser and filter options, and whether it is upgradable according to future needs are also necessary.
Established commercial scanners from manufacturers such as Agilent and Thermo Fisher meet these requirements; check current models and specifications directly, since instrument lines change.
How to Remember
The scanner reads, the chip binds. The microarray chip does the biology (probes catch complementary sample DNA by hybridization). The scanner does the physics (excite dye, measure light). Keep the two jobs separate and the whole topic gets simpler.
Cy3 green, Cy5 red. The two standard dyes and their excitation colors. Cy3 glows green, Cy5 glows red. A two-color scan compares the two, and the red-to-green ratio at each spot is the answer.
PMT scans, CCD snaps. The two architectures in three words. A PMT scanner reads point by point (slow, sensitive, wide dynamic range). A CCD imager captures the whole field at once (fast, simpler, narrower range). Scan versus snapshot.
Emission is longer than excitation. The dye always emits at a longer wavelength than the light that excited it. That gap is what lets filters separate the faint signal from the bright laser. If you remember the shift, you remember why filters are needed.
Key exam facts
| Concept | Fact to remember |
|---|---|
| What the scanner does | Excites fluorescent dye on a hybridized chip, measures emitted light, and digitizes it into per-spot intensities |
| Underlying assay principle | The chip works by nucleic acid hybridization; the scanner only reads the result |
| Standard dyes | Cy3 (excited by green light) and Cy5 (excited by red light) in two-color experiments |
| Key optical trick | Filters separate the longer-wavelength emitted light from the reflected excitation light |
| PMT laser scanner | Confocal, scans point by point; high sensitivity and wide dynamic range; slower |
| CCD imager | Wide-field, captures the whole area at once; faster and simpler; narrower dynamic range |
| Key output | Per-spot intensity, background-subtracted; two-color experiments give a red-to-green ratio |
| Key selection specs | Sensitivity, resolution, dynamic range, scan area, and speed |
Where Students Get Confused
The microarray is not the scanner. The microarray is the chip (the assay); the scanner is the instrument that reads it. "Microarray" and "microarray scanner" are not the same thing.
Hybridization happens on the chip, before scanning. The scanner does not perform hybridization. By the time a chip reaches the scanner, sample has already bound to probes and the chip has been washed. The scanner only measures the resulting fluorescence.
PMT versus CCD. These are two ways to detect the signal, not two parts of one machine. A given scanner is usually one or the other: a confocal PMT laser scanner, or a wide-field CCD imager.
Excitation wavelength versus emission wavelength. The laser excites at one wavelength; the dye emits at a longer one. Filters pass the emission and block the excitation. Confusing the two makes the filter setup seem arbitrary.
Microarray data is quantitative, but relative. A common misconception is that microarray gives only yes/no answers. It measures intensity, which is quantitative, but usually as relative expression (a ratio), not an absolute count.
References
- Buckingham L. Molecular Diagnostics: Fundamentals, Methods, and Clinical Applications. 4th ed. Philadelphia: F.A. Davis; 2026.
- Brown TA. Genomes 5. 5th ed. Boca Raton: CRC Press; 2023.
- Wiltgen M, Tilz G. DNA microarray analysis: principles and clinical impact. Hematology. 2007;12(4):271-287. doi:10.1080/10245330701283967
- National Human Genome Research Institute. DNA Microarray Technology Fact Sheet. genome.gov; 2020. Available at: https://www.genome.gov/about-genomics/fact-sheets/DNA-Microarray-Technology
Frequently Asked Questions
What does a microarray scanner do?
What does a microarray scanner do?
It reads a hybridized DNA microarray. The scanner shines laser light on the chip to excite the fluorescent dyes bound at each spot, measures the light each spot emits, and converts those measurements into a digital image and numerical intensity values that show how much labeled sample bound at each spot.
What is the difference between a PMT scanner and a CCD imager?
What is the difference between a PMT scanner and a CCD imager?
A PMT (photomultiplier tube) scanner uses a focused laser that scans the chip point by point with confocal optics, giving high sensitivity and a wide dynamic range but slower scans. A CCD imager illuminates a whole area at once and captures it with a camera sensor, which is faster and simpler but usually has a narrower dynamic range.
What are Cy3 and Cy5 in microarray scanning?
What are Cy3 and Cy5 in microarray scanning?
They are two fluorescent dyes commonly used to label samples. Cy3 fluoresces green and Cy5 fluoresces red. In a two-color experiment, two samples are labeled with the two dyes, hybridized to the same chip, and the scanner measures the red-to-green ratio at each spot to compare the samples.
Does the scanner perform the hybridization?
Does the scanner perform the hybridization?
No. Hybridization, where labeled sample DNA binds to complementary probes on the chip, happens before scanning. The chip is then washed to remove unbound sample. The scanner only measures the fluorescence remaining at each spot.
Why does a microarray scanner need optical filters?
Why does a microarray scanner need optical filters?
Because each dye emits light at a longer wavelength than the light used to excite it. Filters let the weaker emitted fluorescence through to the detector while blocking the much stronger reflected excitation light, so the detector measures only the signal from the dye.
Is microarray data quantitative?
Is microarray data quantitative?
Yes, but usually in a relative sense. The scanner measures fluorescence intensity, which is a quantitative signal, but microarray experiments typically report relative expression (such as a ratio between two samples) rather than absolute transcript counts, and results are often confirmed with qPCR.

Tankeshwar Acharya, MSc (Medical Microbiology)
Tankeshwar Acharya is an Assistant Professor in the Department of Microbiology at Patan Academy of Health Sciences (PAHS), Nepal, where he has been teaching and practicing clinical microbiology for over 14 years. He is the founder of Microbe Online, one of the leading free microbiology education resources on the web, covering bacteriology, mycology, parasitology, immunology, and clinical laboratory diagnostics written from direct experience in both the classroom and the diagnostic laboratory.
Comments
No comments yet. Be the first to share your thoughts.
Leave a comment
All comments are reviewed before they appear.