
McFarland Densitometer: Parts, Principle, and Operation

On this page
A densitometer is laboratory equipment that measures the turbidity (cloudiness) of a suspension photometrically, by measuring how much light passes through it. In the microbiology laboratory, it is used to measure the density of a bacterial suspension for antimicrobial susceptibility testing.
The densitometer used in a microbiology laboratory is called the McFarland densitometer because it reports turbidity directly in McFarland units. It is an alternative to visually matching a suspension against prepared chemical standards, so it removes the need to prepare barium chloride and sulfuric acid. For what the McFarland standard is and why the 0.5 standard matters for susceptibility testing, see McFarland turbidity standards. The McFarland densitometer typically measures turbidity across a range of about 0.3 to 6.0 McFarland units.
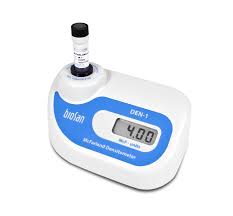 Figure: DEN-1 Biosan McFarland Densitometers
Principle of Densitometer
Like any spectrophotometer and colorimeter, a densitometer also uses the principle of photometry. The light from the stabilized source passes through the optical system inside the densitometers. The amount of light that passes through depends on the density of the suspension: the denser (more turbid) the suspension, the less light is transmitted and the higher the absorbance. In other words, transmitted light falls as density rises. The instrument measures the intensity of the incident ray (Io) and the transmitted ray (It) to calculate optical density.
Here, the optical density (OD) or absorbance (A) is calculated from the ratio of transmitted to incident light: A (or OD) = -log (It/Io).
In the case of a McFarland densitometer, the optical density is digitally displayed as McFarland units instead of absorbance.
Parts of McFarland Densitometer
The parts of the McFarland densitometer include; a light source, digital display, tube holder, power switch, and cable for external power supply.
- Light source: Tungsten light acts as the light source for the densitometer. It is enclosed inside the compact design.
- Digital display: The readings are displayed digitally in the bright LED (light-emitting diode) display. Here the readings are displayed as McFarland units.
- Tube holder: It is detachable and can fit 16 mm or 18 mm glass tubes.
- Cable: It helps to supply electric current for the smooth running of the equipment.
- Power switch: It is a small switch in the front part near the LED display, and turning it on is the first step for operating the equipment.
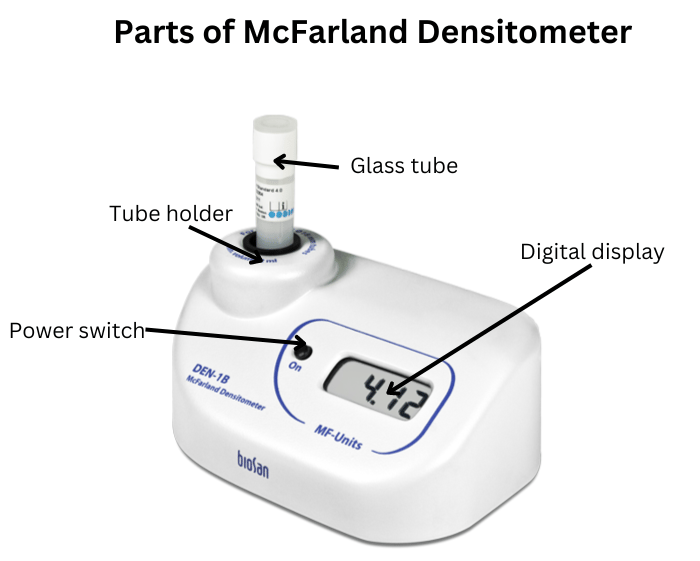 Figure: Parts of McFarland Densitometer
Extra Accessories for McFarland densitometer
These accessories may or may not be provided with the McFarland densitometer.
- Glass tubes: The McFarland densitometer supports glass tubes of 16 mm and 18 mm in diameter.
- Battery: Three AA batteries are required to operate DEN-1B by Grant-Bio as a replacement for the electrical supply.
- CKG16 kit: For calibrating the densitometer that uses 16 mm glass tubes. It consists of 0.5, 1.0, 2.0, 3.0, and 4.0 McFarland turbidity standards.
- CKG18 kit: It is used for the densitometer that uses 18 mm glass tubes. The kit has 0.5, 1.0, 2.0, 3.0, and 4.0 McFarland turbidity standards.
Operating the McFarland Densitometer
Steps for Operating McFarland Densitometer
- Connect the cable or place 3 AA inside the battery holder.
- Then turn the power switch on.
- Firstly place a glass tube without suspension. The reading should be zero.
- Pour at least 2 mL of the prepared suspension into a glass tube of the preferred diameter.
- Place the glass tube in the tube holder.
- Once operated, it takes one second to display the McFarland standard. Dilute or mix the suspension as per requirement.
Calibrating McFarland Densitometer
- The McFarland standard is provided along with the equipment.
- Both 16 mm and 18 mm diameter glass tubes should be used for calibrating.
- Firstly place the tube labeled McFarland standard 0.5 into the tube holder. See the reading. If the reading does not show 0.5 McFarland units, shake the glass tube and repeat the step.
- Then check the tubes labeled 1.0, 2.0, and 4.0 McFarland one at a time in the same way. If any reading is off even after proper shaking, the instrument needs servicing, and the manufacturer or supplier should be contacted.
Things To Consider
- Always calibrate the equipment before use.
- Perform repair and maintenance from time to time.
References
- Tille, P. M. (2022). Bailey & Scott's Diagnostic Microbiology (15th ed.). Elsevier.
- Zapata, A., & Ramirez-Arcos, S. (2015). A comparative study of McFarland turbidity standards and the Densimat photometer to determine bacterial cell density. Current Microbiology, 70(6), 907–909. https://doi.org/10.1007/s00284-015-0801-2
- Biosan. DEN-1 Densitometer (Suspension Turbidity Detector): User Manual. Retrieved from https://biosan.lv/marketplace/pdf/201/
Frequently Asked Questions
How does a McFarland densitometer work?
How does a McFarland densitometer work?
It passes light through a bacterial suspension and measures how much is transmitted. A denser suspension transmits less light, and the instrument converts this into a turbidity reading displayed directly in McFarland units, so no chemical standards need to be prepared.
What is the difference between a McFarland densitometer and a McFarland standard?
What is the difference between a McFarland densitometer and a McFarland standard?
The McFarland standard is a reference suspension of known turbidity (or the target density, such as 0.5). The densitometer is the instrument that measures a suspension's turbidity and reports it in McFarland units, replacing visual comparison against prepared standards.

Tankeshwar Acharya, MSc (Medical Microbiology)
Tankeshwar Acharya is an Assistant Professor in the Department of Microbiology at Patan Academy of Health Sciences (PAHS), Nepal, where he has been teaching and practicing clinical microbiology for over 14 years. He is the founder of Microbe Online, one of the leading free microbiology education resources on the web, covering bacteriology, mycology, parasitology, immunology, and clinical laboratory diagnostics written from direct experience in both the classroom and the diagnostic laboratory.
Comments
No comments yet. Be the first to share your thoughts.
Leave a comment
All comments are reviewed before they appear.