

A laboratory technician in a clinical microbiology laboratory was centrifuging a specimen tube when it cracked inside the centrifuge. An aerosol of potentially infectious material was generated. The technician had not been wearing eye protection, a decision that seemed reasonable at the time, since the procedure was routine. The resulting eye contamination required post-exposure evaluation and a course of prophylactic therapy.
PPE does not feel necessary until the moment it is needed and at that moment, there is no time to put it on. Laboratory accidents follow a predictable pattern: routine procedures, familiar equipment, a momentary lapse in protective measures. The purpose of PPE is not to respond to emergencies but to ensure that when an unexpected exposure occurs, the route of transmission is already blocked.
For microbiology laboratory staff, infection control teams, and clinical personnel, understanding which PPE to use, in which combination, for which specific hazard and how to put it on and take it off without self-contaminating is as fundamental as knowing how to use a pipette.
Personal protective equipment (PPE) is the clothing and equipment worn to protect against occupational hazards, whether chemical, mechanical, radiological, biological, or electrical. Doctors, nurses, laboratory technicians, and other front-line health personnel wear PPE to reduce their risk of exposure to transmissible disease and injury. The type of PPE required depends on the nature of the work and the level of hazard involved. Examples of personal protective equipment in the laboratory include laboratory coats, safety glasses or splash goggles, gloves, etc.
Before using personal protective equipment, one needs to be fully aware of the laboratory protocols. The laboratory personnel should avoid short dress, loose clothing, ornaments, open hair, and open-toe shoes. The appropriate protocol needs to be followed while donning (putting on) PPE and doffing (taking off) PPE.
Types of the Personal Protective Equipment (PPE)
Personal protective equipment covers several categories: body protection, eye and face protection, hand protection, hearing protection, and respiratory protection.
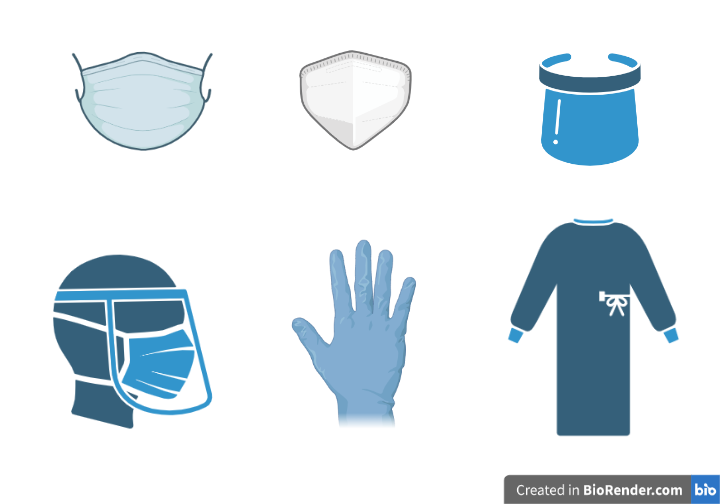 Figure: Personal Protective Equipment (PPE) in the laboratory
Body protection
Lab coats
It protects the laboratory personnel’s clothes and skin from any stains of the dyes, blood, or any other dust, dirt, or laboratory contaminants. Lab coats are commonly made from a 65% cotton, 35% polyester blend, which balances durability and comfort. Cotton resists ignition better than polyester, which melts and can adhere to skin, so 100% cotton or flame-resistant coats are preferred where a fire or pyrophoric hazard exists.
When the lab coat is kept in the laboratory only, it minimizes the risk of cross-contamination to the other surface areas and minimizes its hazard. Chemical resistant sleeves and aprons can be used based on the hazard and potential risk assessment.
Aprons
An apron is used when any additional hazard-specific splash protection is required. It is used in the process of dispensing liquid nitrogen. An apron is used when a large volume of the fluid sample is to be handled or when handling chemicals. In the laboratory, an apron is also used during the autopsy.
Gowns
The gown provides coverage like that of laboratory coats; solid-front and has back-closing garments with elasticized cuffs. One can wear it on top of the scrub or top of their clothing. Both the disposable gown and wraparound gowns are available.
Coveralls
Coveralls are worn over personal clothing or scrubs and are available in disposable and reusable forms. Removal requires care to avoid self-contamination. Coveralls with a covered zip flap should be used where splash protection is needed.
Footwear
Footwear should be closed, covering the whole top of the foot, and well-fitting. It should have slip-resistant soles and, where heavy items are handled, protect against injury from falling objects. Open-toe shoes and sandals are never acceptable in a laboratory.
Eye and Face protection
Safety glasses and goggles
Safety glasses are the minimum eye protection for laboratory work and protect against flying particles and fragments, but their open sides mean they do not protect against chemical splash. Chemical splash goggles, which seal against the face, are required whenever liquids are handled in volume or under pressure. Standard safety glasses also do not block UV or laser radiation; filtered eyewear rated for the specific wavelength is needed for that work.
Face Shields
Where there is a risk of splash, a face shield should be worn in addition to safety glasses or goggles, never instead of them, since a face shield alone does not seal around the eyes. Splash hazards arise when handling large volumes of liquid, dispensing cryogens, preparing corrosive baths, or working with molten material.
Respiratory Protection
Respiratory protection is required wherever there is an inhalation hazard from harmful gases, vapors, aerosols, or irritants
Surgical Mask vs N95 Respirator
The COVID-19 pandemic brought widespread awareness of masks and respirators but also significant confusion about when each is appropriate. For laboratory and clinical settings, the distinction is important:
| Feature | Surgical mask | N95 respirator (or equivalent: FFP2, KN95) |
|---|---|---|
| Fit | Loose-fitting. It has gaps at sides | Tight-fitting. It must seal to face |
| Filtration | Filters large respiratory droplets; fluid-resistant outer layer | Filters at least 95% of airborne particles, including small-particle aerosols |
| Protection from | Droplet transmission; splash/spray of body fluids to nose/mouth | Airborne transmission; aerosols; fine particles; droplets |
| Protection for | Wearer (limited) and patient (from wearer's respiratory emissions) | Wearer primarily |
| Fit testing required | No | Yes. Annual fit test recommended; seal check before each use |
| Use in laboratory | Routine clinical work with droplet-generating specimens; patient care | Aerosol-generating procedures with respiratory pathogens; BSL-3 work; TB specimen processing; suspected airborne pathogen |
| Donning | Place over nose/mouth; mold to nose; tie or loop | Perform seal check from cup to face, breathe in sharply; no air should escape around edges |
When to use N95 in clinical microbiology: N95 (or equivalent FFP2/FFP3) should be used when: (1) processing sputum for TB culture or smear, sputum induction and processing generate aerosols of potentially viable M. tuberculosis; (2) opening centrifuge tubes after spinning respiratory specimens; (3) vortexing or sonicating specimens; (4) any procedure generating aerosols from a specimen of unknown infectious status in an inadequately ventilated area.
Surgical mask is not respiratory protection. This was clearly established before COVID-19 but bears repeating: a surgical mask does not protect the wearer against airborne particles. It protects against large respiratory droplets and prevents the wearer from contaminating the environment. For inhalation protection against aerosols, only a properly fit-tested N95 or powered air-purifying respirator (PAPR) provides adequate protection.
Hand Protection
Gloves
Gloves protect the laboratory personnel’s hands from the risk of exposure to the various contagious laboratory samples. They minimize the hazards of chemicals. The most commonly used glove materials are nitrile, latex, and vinyl. For the laboratory, the minimum protective glove is the disposable nitrile glove.
Disposable gloves should be removed immediately on contact with chemicals. They should never be reused or disinfected, since exposure to disinfectants and prolonged wear degrade the glove and reduce the protection it offers. Check each glove for tears before putting it on.
Reusable gloves need to be washed thoroughly and air-dried before using them. The selection of gloves depends upon the purpose and nature of the work. For example, insulated gloves can prevent excess heat, and cut-resistant gloves need to be used to avoid cuts and abrasions.
Glove Material Selection Guide
Not all gloves provide equal protection against all hazards. The choice of glove material should be matched to the specific chemical or biological risk:
| Glove material | Best for | Limitations | Notes |
|---|---|---|---|
| Nitrile | Biological specimens; most dilute chemicals; oils; some organic solvents | Limited protection against concentrated ketones, acetone, some chlorinated solvents | Standard choice for clinical microbiology; latex-free |
| Latex | Biological specimens; aqueous chemicals | Latex allergy risk (staff and patients); deteriorates with oils and solvents | Being phased out in many institutions due to allergy concerns |
| Vinyl | Low-risk biological work; mild aqueous chemicals | Poor puncture resistance; poor chemical resistance | Not suitable for high-risk biological or chemical work |
| Neoprene | Organic acids; alcohols; oils; some solvents | Bulkier than nitrile | Good all-round chemical resistance |
| Butyl rubber | Ketones; esters; concentrated acids and alkalis; peroxides | Expensive; limited dexterity | Best for highly hazardous chemicals |
| Cryogenic (insulated) | Liquid nitrogen; dry ice; cryogenic storage | Provide no chemical protection | Thermal insulation only, must be worn with chemical gloves beneath if chemical risk also present |
| Cut-resistant | Glass handling; scalpels; microtomes | Provide no chemical or biological protection | Prevent cuts, not contamination |
Breakthrough time matters: Every chemical glove material has a breakthrough time, the duration before the chemical permeates through the glove to the skin. For extended work with organic solvents, check the glove manufacturer's chemical resistance chart for the specific chemical and select a glove with breakthrough time exceeding your expected exposure duration. Nitrile gloves, for example, have a breakthrough time of minutes for acetone at high concentrations.
Double gloving: For high-risk biological work (BSL-3, known HIV/HBV-positive specimens, suspected hemorrhagic fever), double gloving provides a backup layer if the outer glove is torn. The outer glove should be changed between patients; the inner glove provides a second barrier during the change.
Hearing Protection
If the laboratory personnel are exposed to excessive noise or ultrasound (high frequency), it may cause hearing loss. Ear plugs and ear muffs help in protecting the ear.
Ear plugs
Ear plugs reduce the noise reaching the ear through the ear canal. When inserted correctly, the plug expands to fill the canal and seal against its wall. Both the disposable and the reusable earplugs are available.
Ear muffs
Ear muffs enclose the external ear entirely and seal against the head. The inner surface is lined with acoustic foam. Wearing ear muffs together with ear plugs gives greater attenuation than either alone, and is used where noise levels are very high.
PPE Selection by Biosafety Level
The combination of PPE required depends on the biosafety level (BSL) of the work being performed, not simply on personal preference or habit. WHO and CDC define minimum PPE requirements for each biosafety level:
| BSL Level | Work examples | Minimum PPE required |
|---|---|---|
| BSL-1 | Non-pathogenic organisms; teaching lab strains (B. subtilis, non-pathogenic E. coli) | Lab coat; disposable gloves; eye protection when splash risk present |
| BSL-2 | Most clinical diagnostic work, S. aureus, E. coli, Salmonella, M. tuberculosis (routine smears), HIV, HBV in standard volumes | Lab coat; disposable gloves; eye protection; surgical mask or N95 when aerosol-generating procedures; biosafety cabinet for aerosol-generating procedures |
| BSL-3 | Concentrated M. tuberculosis cultures; Brucella; Coxiella burnetii; arboviruses | Full gown (solid-front, back-closing); double gloves; N95 respirator or PAPR; face shield; all work in certified Class II BSC |
| BSL-4 | Ebola, Marburg, Lassa, other high-consequence pathogens | Full pressure suit or positive-pressure whole-body suit; only in certified maximum containment facility |
For most clinical microbiology laboratories (BSL-2): The standard minimum is lab coat + gloves + eye protection. When performing aerosol-generating procedures (vortexing, pipetting, centrifuging, opening culture tubes), add a surgical mask or N95 depending on the organisms being handled. Work in a biosafety cabinet whenever open manipulation of specimens or cultures is required.
Choosing PPE for Specific Hazards
Different hazards require different protective equipment. The table below maps common laboratory hazards to the appropriate PPE:
| Hazard | Eyes/Face | Hands | Body | Respiratory |
|---|---|---|---|---|
| Biological: clinical specimens (blood, body fluids) | Safety glasses or goggles | Nitrile disposable gloves | Lab coat | Surgical mask if splash risk |
| Biological: aerosol-generating (vortexing, centrifuge) | Goggles or face shield | Nitrile gloves | Lab coat | N95 respirator; work in BSC |
| Biological: BSL-3 organisms | Goggles + face shield | Double gloves | Solid-front gown | N95 or PAPR |
| Chemical: corrosive acids/alkalis | Splash goggles (not safety glasses) | Butyl rubber or neoprene gloves | Chemical-resistant apron | Ventilated fume hood; half-face respirator if vapors present |
| Chemical: organic solvents (xylene, ethanol, acetone) | Safety glasses | Nitrile gloves (check breakthrough time) | Lab coat | Fume hood; organic vapor respirator if ventilation inadequate |
| Chemical: formaldehyde/formalin | Splash goggles | Nitrile or butyl rubber gloves | Lab coat + apron | Fume hood; formaldehyde-rated respirator cartridge |
| Chemical: liquid nitrogen/cryogens | Face shield | Cryogenic gloves (insulated) | Lab coat + cryo apron | None typically required; adequate ventilation |
| Physical: UV light (transilluminator, biosafety cabinet UV) | UV-blocking face shield or goggles | UV-opaque gloves | Lab coat with long sleeves | None |
| Physical: sharps | Puncture-resistant sleeve if needed | Puncture-resistant gloves (not standard nitrile) | Lab coat | None |
| Radiation | Acrylic shielding for beta emitters; lead for gamma and X-rays | Standard gloves plus appropriate shielding | Lab coat; lead apron for gamma/X-ray work | Consult your radiation protection officer for the specific isotope |
Key principle, layered protection: PPE items are not mutually exclusive. A splash of concentrated acid requires goggles (not just safety glasses), chemical-resistant gloves (not nitrile), a chemical apron (not just a lab coat), and proximity to an eyewash station. Assess the hazard, then select the combination that covers all exposure routes for that specific risk.
How to Put On PPE (Donning)
The correct donning sequence ensures that each layer of PPE is applied without contaminating the next item. Two sequences are presented: the standard laboratory sequence for routine BSL-2 work, and the enhanced sequence for high-risk or BSL-3 work.
Standard Laboratory Donning Sequence (BSL-2 Routine Work)
- Wash hands or use alcohol-based hand sanitizer before touching any PPE
- Put on lab coat: fasten all buttons/snaps; ensure cuffs cover wrists
- Put on N95 or surgical mask if aerosol-generating procedure or mask required by protocol
- Put on eye protection (safety glasses or goggles): ensure secure fit
- Put on gloves: pull cuffs over lab coat cuffs
- Perform a final visual check before beginning work
Enhanced Donning Sequence (High-Risk / BSL-3 / Suspected VHF)
(A trained observer should supervise donning and doffing for all high-risk work)
- Perform hand hygiene
- Put on scrubs (inner clothing layer)
- Put on rubber boots or closed, fluid-resistant shoes + overshoes
- Put on impermeable gown or solid-front coverall over scrubs; ensure wrist coverage
- Put on N95 respirator or PAPR: perform seal check
- Put on goggles
- Put on face shield over goggles
- Put on head cover
- Perform hand hygiene
- Put on inner gloves (first pair)
- Put on outer gloves over gown cuffs
- Observer performs final check: no skin exposed; no gaps between PPE items
During work: Avoid touching or adjusting PPE with gloved hands. If a glove tears, move away from the work area, remove the torn glove, perform hand hygiene, and put on a fresh glove before returning. Change outer gloves between patients.
How to take off PPE (Doffing)
The Critical Principle: Dirty-to-Clean, Outside-to-Inside
Doffing is the highest-risk step in PPE use. Most PPE-associated contamination events occur during removal, not during use. The governing principle is:
Remove the most contaminated item first, touch only the inside (uncontaminated surface) of each item, and perform hand hygiene between every step.
The outside surface of every PPE item is considered contaminated. Never touch the outside of your mask, the outside of your goggles, or the outer surface of your gown during removal. The gloves (the most contaminated item) come off first, using the inside-out technique that ensures your clean skin never touches the contaminated outer surface.
Standard Laboratory Doffing Sequence (BSL-2)
- Gloves removal technique
- Firstly, peel one glove by grasping it with the other gloved hand starting from the side of the palm.
- Then, hold the glove with the gloved hand, slide the ungloved hand’s fingers under the remaining glove at its wrist, and peel off the second glove over the first glove.
- Finally, discard into biohazard waste.
- Perform hand hygiene immediately after glove removal
- Eye protection: remove from behind by the frame/headband; do not touch the front lens surface; place in designated container for reprocessing or discard
- Gown or lab coat: unfasten; roll away from body touching only inside surfaces; fold contaminated side inward; discard in biohazard waste (disposable) or place in designated laundry container
- Mask: grasp ties/elastic from behind; do not touch the front; discard into waste
- Perform hand hygiene: final step
Enhanced Doffing Sequence (High-Risk / BSL-3)
A trained observer must supervise doffing for all high-risk work, calling out each step and checking for self-contamination.
Sequence: outer gloves → gown/coverall (roll inward) → hand hygiene → face shield → goggles → N95 (grasp from behind; do not touch front) → hand hygiene → head cover → inner gloves → hand hygiene → move to clean area → remove boots → final hand hygiene
The respirator comes off last and outside the patient room or work area. Removing the N95 inside the contaminated work area exposes the face to residual aerosols. Step out, close the door, then remove the respirator.
Limitations of PPE
PPE is the last line of defense in the hierarchy of controls. It should be used after engineering controls (biosafety cabinets, fume hoods, enclosed systems) and administrative controls (procedures, training, work organization) have been implemented. PPE has real limitations that every laboratory worker should understand:
| PPE item | Limitation |
|---|---|
| Lab coat | Does not protect against chemical fire; does not protect against chemical splash if not chemical-resistant; does not protect the face, neck, or legs |
| Nitrile gloves | Breakthrough times for many organic solvents are minutes; provide no cut protection; punctured by sharps |
| Safety glasses | Do not protect against chemical splash (gaps at sides and top); do not protect against UV light unless UV-rated |
| Surgical mask | Does not filter aerosols; does not protect the wearer against airborne pathogens |
| N95 respirator | Only effective with proper fit and seal; becomes less effective when wet (moisture from breathing reduces filtration); facial hair prevents adequate seal |
| Gloves (any type) | Create false sense of security — hand hygiene still required after glove removal; torn gloves may not be noticed; hands may be contaminated during doffing |
Hierarchy of controls; PPE is last resort:
| Priority | Control type | Examples |
|---|---|---|
| 1st (most effective) | Elimination | Remove the hazard entirely |
| 2nd | Substitution | Replace a hazardous chemical with a less hazardous alternative |
| 3rd | Engineering controls | Biosafety cabinets, fume hoods, enclosed systems, ventilation |
| 4th | Administrative controls | Procedures, training, work scheduling, signage |
| 5th (least effective alone) | PPE | Lab coats, gloves, masks, goggles |
PPE does not reduce the hazard, it only reduces exposure to an unchanged hazard. Engineering controls that contain or eliminate the hazard are always more reliable than PPE that depends on human behavior.
Disposal of Used PPE
Contaminated PPE is infectious waste and must be disposed of according to laboratory waste management protocols, not in general waste bins.
| PPE item | Disposal method |
|---|---|
| Disposable gloves (non-contaminated routine work) | General waste |
| Disposable gloves (contaminated with infectious material) | Yellow/red biohazard bag; autoclave before disposal if high-risk |
| Disposable gown/coverall (routine BSL-2) | Biohazard bag |
| Disposable gown/coverall (BSL-3 or high-risk) | Autoclave in sealed bag before disposal; or incinerate |
| Reusable lab coat (routine) | Dedicated laundry bag; laundered separately from domestic clothing; never taken home |
| N95/surgical mask (single use) | Biohazard bag; do not reuse or share |
| Reusable goggles/face shield | Decontaminate with 70% alcohol or 0.1% hypochlorite; rinse; store clean |
| Reusable rubber boots | Decontaminate by spraying or wiping with 0.5% hypochlorite; allow contact time; rinse; air dry |
Reusable PPE must be decontaminated before leaving the laboratory. A lab coat taken home for washing is a route of community exposure. Reusable PPE that is contaminated during high-risk work must be autoclaved or chemically decontaminated before removal from the laboratory.
For full laboratory waste disposal protocols, see Hospital and Laboratory Waste Management
How to Remember
PPE works in layers: each layer covers a different route of exposure:
- Body (lab coat, gown): protects against splash and contact contamination
- Hands (gloves): protects against the most common route (hand-to-mucous membrane)
- Eyes/face (glasses, goggles, shield): protects against splash to the most vulnerable mucous membranes
- Respiratory (mask, N95): protects against inhaled aerosols and droplets
Each layer is independent. Wearing gloves does not protect your eyes. Wearing a mask does not protect your hands. A complete risk assessment asks: what is the exposure route for this hazard, and is that route covered?
The donning-doffing asymmetry: Donning (putting on) = clean to dirty = any order within the sequence is relatively low risk. Doffing (taking off) = dirty to clean = sequence is critical. Always: most contaminated off first; hands cleaned between each item; respirator last outside the room.
The N95 memory rule: Surgical mask = droplet defense (large particles, splash). N95 = aerosol defense (small particles, sustained airborne exposure). If you are generating aerosols from a respiratory specimen, you need an N95, not a surgical mask.
Three questions before starting any laboratory procedure:
- What is the hazard? (biological, chemical, physical)
- What is the exposure route? (splash, aerosol, contact, inhalation)
- Is the PPE I have on protecting that route for this specific hazard?
References
- U.S. Department of Health and Human Services, CDC, NIH. Biosafety in Microbiological and Biomedical Laboratories (BMBL). 6th ed. 2020.
- World Health Organization. Laboratory Biosafety Manual. 4th ed. Geneva: WHO; 2020.
- National Institute for Occupational Safety and Health. NIOSH-Approved Respirators. CDC/NIOSH.
- Centers for Disease Control and Prevention. Sequence for Putting On and Removing Personal Protective Equipment. CDC.
- Tille PM. Bailey & Scott's Diagnostic Microbiology. 15th ed. St. Louis: Elsevier; 2022.

Comments
No comments yet. Be the first to share your thoughts.
Leave a comment
All comments are reviewed before they appear.