
Inoculating Loop: Types, Parts, Uses, and Sterilisation in Microbiology
The inoculating loop is the primary instrument for transferring and streaking bacteria in microbiology. Learn its types (nichrome, platinum, disposable, calibrated), how to sterilize and cool it correctly, clinical uses including semi-quantitative urine culture, and common errors.

On this page
Consider what happens when loop technique fails in a diagnostic laboratory.
A technician subcultures a colony from a blood culture bottle onto a fresh agar plate. The loop was flamed, but not cooled long enough; it was still warm when it touched the plate. The bacteria from the intended colony were killed on contact. But the loop had also grazed the bench surface during cooling, picking up an environmental contaminant. The next day, the plate shows growth, not the original pathogen, but a skin commensal. The report reads "mixed growth." The clinician, uncertain, withholds targeted therapy and continues broad-spectrum antibiotics. A simple technique failure, invisible at the time it happened, shaped a treatment decision.
This is why the inoculating loop rewards understanding, not just memorization of steps.
The inoculating loop is the microbiologist's primary instrument. Nearly every core task in the laboratory, isolating a colony, making a smear for Gram stain, inoculating a biochemical test, plating a urine culture, begins with a loop transferring a few bacteria from one place to another.
The inoculating loop is not a sophisticated piece of equipment. It is a small circle of wire, 2–4 mm in diameter, attached to an insulated handle. Its power comes entirely from the technique used with it: proper sterilization, correct cooling, appropriate inoculum size, and controlled pressure on the agar surface. When used correctly, it is the cleanest, most reliable, and most versatile transfer instrument in microbiology. When used incorrectly, it contaminates, kills, and produces uninterpretable results.
An inoculating loop is essential laboratory equipment which is also called an inoculation loop, smear loop, inoculation wand, or microstreaker. Inoculating loops are used in the laboratory to pick the bacterial colony, transfer the microorganisms, and inoculate the samples in the culture media plates or the broths in a tube. It is also used in making smears on the slide.
The wire of the inoculating loop is usually made of the nichrome wire, which is sterilized by flaming in the bunsen burner or a bacterial incinerator till it becomes red hot. The diameter of the inoculating loop used in the microbiology laboratory is usually 2mm and 4 mm, and the length of the wire is 6 cm. The calibrated loop used mostly in the laboratory is 1 µl and 10 µl, which helps in precise volume inoculation.
Why Aseptic Technique with the Loop Matters
The inoculating loop operates at the interface between the clinical specimen and the culture medium. Every movement it makes either transfers bacteria intentionally (to isolate, identify, or count) or contaminates unintentionally (introducing organisms from the environment, the operator's skin, or a previous specimen).
Three principles govern all loop work:
1. Sterility before pickup: The loop must be sterile when it contacts either the specimen or the medium. Any organism on the loop before pickup becomes part of the transfer, producing false-positive cultures, mixed results, and uninterpretable susceptibility tests.
2. Cooling after flaming: A loop heated to red heat in the Bunsen burner or incinerator is too hot to touch agar or pick up bacteria, it will kill rather than transfer. The 15–30 second cooling period is essential. A cooled loop can be tested by briefly touching the agar edge away from any growth; if the agar crackles or the loop hisses, wait longer.
3. Single-use between sterilizations: Once a loop has contacted bacteria, it must be re-sterilized before contacting a new area. Carrying organisms from one area to another without sterilization defeats the purpose of isolation.
Why flaming kills bacteria: Heating nichrome or platinum wire to red heat (above 800°C) denatures all proteins and destroys all nucleic acids instantaneously. There is no bacterial species capable of surviving direct flaming. This physical destruction is more reliable than chemical disinfection and leaves no residue that could interfere with subsequent culture.
Parts of Inoculating Loop
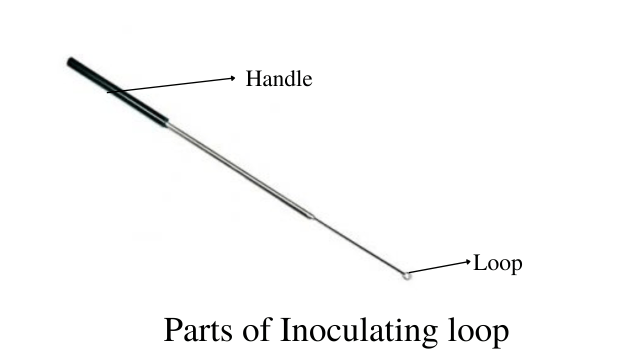 Figure: parts of inoculating loop
The inoculating loop consists of the loop and the handle. Loop is used to carry the sample, whereas the handle supports the wire. The handle of the inoculating loop is made up of aluminum. Both insulated and non-insulated handles are available. Handles are usually insulated by polyvinyl chloride (PVC), which protects the hand during its use.
Types of Inoculating Loop
There are different types of inoculating loops based on the material and the size of the loop.
Metal inoculating loop
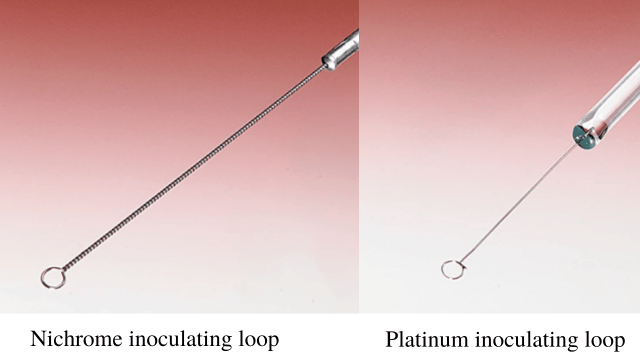 Figure: wire of inoculating loop
- The inoculating loop wire is made from nichrome, platinum, or tungsten. These metal wire loops are reusable.
- Nichrome is a nickel-chromium alloy: cheap, corrosion-resistant, and quick to heat and cool, which is why it is the standard reusable loop. Its melting point is about 1400°C, close to a fully open Bunsen flame (~1500°C), so you hold it in the hot blue region only long enough to reach red heat. Repeated flaming gradually thins the wire, so reusable loops eventually need replacing.
- Though platinum wire is a bit expensive, it is durable and can resist constant exposure to acid and flame better than nichrome wire.
Disposable inoculating loop
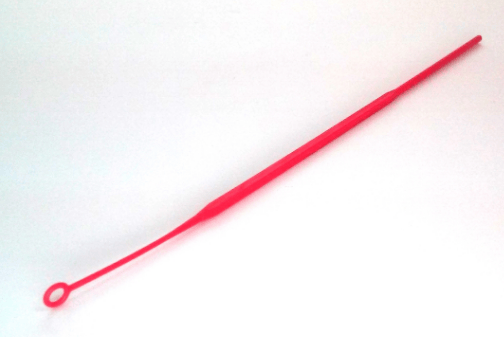 Figure: Disposable inoculating loop, Image source: Prolab Diagnostics
These are made from plastic resin, polystyrene, polypropylene, ABS (Acrylonitrile Butadiene Styrene), or inert biological polymer. These inoculated loops are discarded after their use. Disposable loops are available in both sterile and nonsterile conditions. Disposable inoculating loops are suitable under the hoods and in the anaerobic chamber. It minimizes the risk of infection from the aerosols generated during flaming by the pathogenic substances.
Combo loop
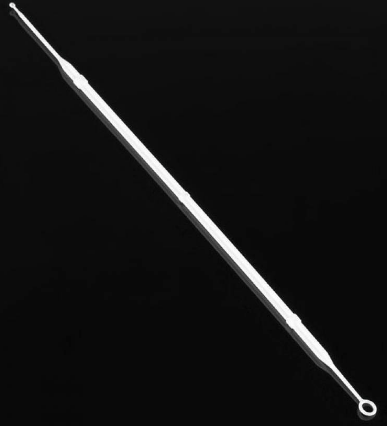 Figure: Combo loop, Image source: Universal Medical
Combi loops are also called combo loops. In both ends, two loops are present. One end has a loop with a diameter of 10 µl, and the next end has a loop with a diameter of 1 µl.
Inoculating loop with needle
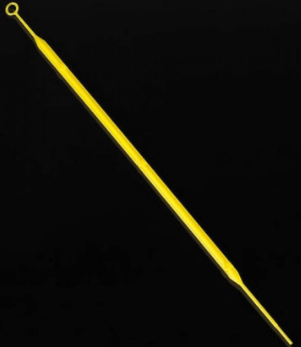 Figure: Inoculating loop with a needle, Image source: Labproinc
It consists of both the loop and needle at the opposite ends.
Calibrated loop
Calibrated loops of 1µL and 10 µL help take the sample’s exact volume. These calibrated loops can be of metals that can be reused or of disposable plastics.
Why the calibrated loop makes counting possible: A 1 µL loop delivers one-thousandth of a milliliter. So each colony that grows from it represents roughly 1,000 bacteria in the original milliliter. Count the colonies, multiply by 1,000, and you have an estimate in CFU/mL.
For example, 100 colonies from a 1 µL loop indicates about 10⁵ CFU/mL, the classic threshold for significant bacteriuria. A 10 µL loop delivers ten times more sample, so its multiplier is ×100, giving higher sensitivity for lower colony counts. This is the whole reason a bent piece of wire can produce a quantitative result.
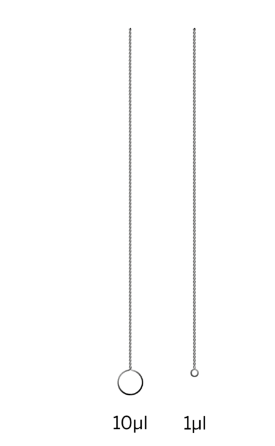 Figure: Nichrome wire calibrated loop
For the full semi-quantitative urine culture procedure including colony count interpretation and CFU/mL calculations using the 1 µL and 10 µL loops see Laboratory Diagnosis of Urinary Tract Infection.
Comparison of Loop Types
| Type | Material | Reusable? | Sterilization | Best for | Limitations |
|---|---|---|---|---|---|
| Nichrome wire | Nickel-chromium alloy | Yes | Bunsen burner or incinerator | General routine bacteriology; most common in clinical labs | Slight risk of aerosol generation during flaming with infectious material |
| Platinum wire | Platinum | Yes | Bunsen burner | Precise work; acid-resistant; longer loop life | Expensive — 10–20× the cost of nichrome |
| Tungsten wire | Tungsten | Yes | Bunsen burner | High-temperature applications; very durable | Higher melting point — slower to heat to red hot |
| Disposable plastic | Polystyrene or polypropylene | No, single use | Pre-sterilized; discard after use | BSL-2/BSL-3 work; anaerobic chambers; reducing aerosol risk | Cannot be re-sterilised; creates plastic waste; not suitable for open flame environments |
| Calibrated (1 µL) | Metal or plastic | Metal: yes; Plastic: no | As per material | Semi-quantitative urine culture; precise volume transfer | More fragile than standard loops; must be used at correct angle for accurate volume |
| Calibrated (10 µL) | Metal or plastic | Metal: yes; Plastic: no | As per material | Urine culture with higher sensitivity; stool culture semi-quantification | As above |
| Combo loop | Plastic | No | Pre-sterilized | Convenience when both 1 µL and 10 µL volumes needed | Single use only |
Nichrome vs platinum in clinical labs
Most diagnostic laboratories use nichrome wire loops for routine work because of the cost difference. Platinum is reserved for specialized applications where its superior acid resistance or durability under repeated flaming justifies the expense.
One important exception is the oxidase test: nichrome and other base-metal wires can give a false-positive oxidase reaction, so a platinum loop, a plastic loop, or a wooden stick should be used to pick colonies for oxidase testing. In resource-limited settings like Nepal, nichrome loops are the practical standard for everything except this specific test.
How to use an inoculating loop?
Inoculating loop made of the metals needs to be sterilized before its use, while the plastic inoculating loop is readily sterile.
Sterilization
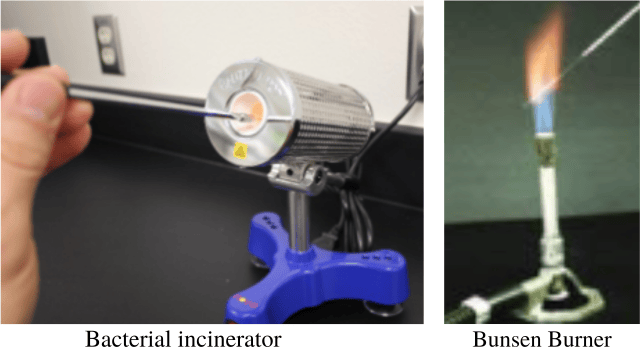 Figure: Sterilization of inoculating loop
- Hold the inoculating loop in the handle using the thumb and the first two fingers just like you hold the pen. Then sterilize the inoculating loop in the blue flame of the bunsen burner till it becomes red hot.
- An inoculating loop can be sterilized in the bacterial incinerator in which there is no open flaming and prevents the formation of aerosols from the infectious substances.
- Once the loop is sterilized, allow it to cool down for 15-30 seconds. But be sure not to touch any surface once it is sterilized because it will be contaminated. If you mistakenly touch any surface after sterilizing it, you need to repeat the process and sterilize it until it becomes red hot. Then it can be used for inoculations.
- A disposable inoculating loop does not need to be flamed, so after use, it is discarded safely. Be sure to follow the laboratory protocols while discarding the waste.
Common Errors and How to Avoid Them
| Error | Consequence | Prevention |
|---|---|---|
| Not cooling the loop before picking up bacteria | Loop kills bacteria on contact, false-negative culture; no growth in intended area | Wait 15–30 seconds after flaming; test by touching edge of agar away from growth |
| Not cooling the loop before touching agar | Melted agar track visible on plate; organisms from previous area die | Same as above |
| Too much inoculum in first streak area | Confluent growth across entire plate; no isolated colonies in final quadrant | Use only the tip of a small, just-cooled loop; pick a portion of a single colony rather than a loopful |
| Re-entering previous streak area without sterilizing | No dilution gradient; final quadrant as dense as first | Enter each new area only from the last few streaks of the previous area, after flaming |
| Gouging the agar | Torn agar debris in streaks; multiple colony types from agar contamination | Hold loop at 30–45° angle; barely graze the surface; do not press down |
| Contaminating after sterilization | Mixed culture result | Never lay a sterilized loop on the bench; do not touch any surface between flaming and inoculation |
| Aerosol generation when flaming infectious material | Exposure risk; biohazard | Use electric incinerator (no open flame) for infectious specimens; flame slowly from tip to handle end |
| Calibrated loop at wrong angle | Inaccurate volume delivery; unreliable colony count | Hold vertically (90° to specimen surface) for calibrated loops; practice technique |
How to Remember
"Hold it like a pen, flame it like a match, cool it like patience." This three-phrase rule covers the three most important practical points: grip (pen hold for control), sterilization (full red heat, tip to where the wire enters the handle), and cooling (never rush, a hot loop kills).
The loop is a dilution device, not just a transfer device. In a streak plate, the loop does not just move bacteria from one spot to another, it progressively reduces the number of bacteria carried in each successive quadrant, creating a gradient from dense growth to isolated single colonies. The loop works by dilution, not just delivery.
Calibrated loop = pipette substitute. The 1 µL and 10 µL calibrated loops deliver precise volumes the same way a pipette does, but without needing a pipette, tip, or calibration device. They turn a loop into a quantitative instrument. This is why urine culture colony counts are possible with a wire loop and an agar plate.
Loop vs needle, the depth rule: If the inoculation goes across the surface → loop. If it goes into the medium → needle. SIM, TSI stab, gelatin stab, motility media, all require the needle because depth is the diagnostic variable.
The wire metals, a mnemonic for the clinical lab: Nichrome = Normal laboratory use (cheap, reliable, standard) Platinum = Premium and precise (expensive, acid-resistant, research) Disposable = Danger reduction (BSL-2/3, infectious specimens, no aerosol risk)
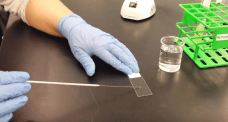 Figure: Smear on a slide
Uses of Inoculating Loop
- Inoculating loop is used in picking the colony of bacteria or fungi.
- To obtain the isolated colony from the streaking, follow the protocols of the streak plate method and sterilize it at every step. It helps to reduce the microbial load so that pure and isolated colonies can be isolated. While picking the colony, also be sure you pick only the selected colony.
- When you are holding the inoculating loop in one hand, handle the Petri dish in another hand. While performing the quadrant method of streaking, sterilize before and after inoculation in every quadrant.
- Inoculating loop is used to inoculate in the agar plate, the slant of biochemical media, and the broth tubes.
- If you are inoculating the sample in the broth media in tubes, take the loopful of the sample and immerse it in the broth.
- Mix it slightly with the inoculating loop and place the cotton or the caps in the tube.
- Inoculating loop is used to make the smears on the slide.
- If you are making the smear from the isolated colonies for Gram stain, gently touch the colony and make the smear. If you take a heavy inoculum by taking a loopful of colonies smear will be thick. So be sure you follow the protocol properly.
- Once you are done with inoculating the loop, sterilize it again and keep it in the rack in the aseptic condition.
- Inoculating loop transfers the microorganisms in an aseptic condition and prevents cross-contamination.
Inoculating Loop vs Inoculating Needle
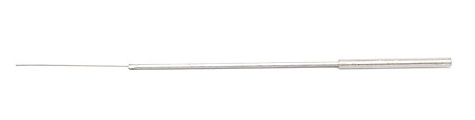 Figure: Inoculating needle
The inoculating needle has the same construction as the loop (nichrome or platinum wire, insulated handle, same sterilization procedure) except the wire end is straight rather than circular. The choice between loop and needle depends on the technique required:
| Application | Loop | Needle |
|---|---|---|
| Streak plate isolation | ✅ Yes. Loop picks up and carries adequate inoculum | ✗ No. Needle carries insufficient volume for effective streaking |
| Agar plate subculture | ✅ Yes | ✅ Yes (for picking single tiny colonies) |
| Broth tube inoculation | ✅ Yes. Mix well | ✅ Yes |
| Stab inoculation (semi-solid or solid media) | ✗ Not suitable. Loop cannot penetrate deeply | ✅ Essential. Needle stabs straight down to the bottom of the tube |
| Motility media (SIM, mannitol motility) | ✗ No | ✅ Stab to mid-tube; non-motile organisms grow only along stab line; motile organisms diffuse outward |
| TSI agar stab | ✗ Butt inoculation requires needle | ✅ Yes, stab butt; streak slant |
| Gelatin stab (liquefaction) | ✗ No | ✅ Yes, stab and observe around the stab line |
| Picking micro-colonies | ✗ Loop may pick up adjacent colonies | ✅ Yes, needle tip more precise |
| Smear preparation | ✅ Yes | ✅ Yes |
| Calibrated volume transfer | ✅ Calibrated loops only | ✗ No |
The rule is simple: use the loop for anything across the surface, and the needle for anything that goes down into the medium.
Key exam facts in one table
| Topic | Key fact |
|---|---|
| Standard loop diameter | 2–4 mm; wire length 6 cm |
| Standard calibrated loop volumes | 1 µL and 10 µL |
| Nichrome composition | Nickel + chromium alloy; melting point ~1400°C |
| Nichrome vs. platinum | Nichrome = routine (cheaper); platinum = premium (acid-resistant, more durable) |
| Sterilization temperature | Red heat (above ~800°C) incinerates all organisms on the wire, including spores, by burning them off completely |
| Cooling time after flaming | 15–30 seconds; test by touching agar edge away from growth |
| Why disposable loops are preferred in BSL-2/3 | Eliminate aerosol generation risk from flaming infectious material |
| Loop vs. needle | Loop = surface transfer (streak, smear, broth); needle = depth inoculation (stab media) |
| Media requiring needle, not loop | SIM, TSI butt, gelatin stab, motility media |
| Calibrated loop clinical use | Semi-quantitative urine culture, 1 µL loop: colonies × 1000 = CFU/mL |
| Most common technique error | Not cooling sufficiently before touching agar or specimen |
| Prevention for aerosol risk | Use electric incinerator (not open Bunsen flame) for infectious specimens |
| Loop in streak plate, mechanism | Progressive dilution across quadrants, not just transfer which creates isolated colonies by reducing bacterial load |
References
- Leber AL, editor. (2016). Clinical Microbiology Procedures Handbook (4th ed.). Washington, DC: ASM Press. https://doi.org/10.1128/9781683670438.CMPH
- Cheesbrough, M. (2006). District Laboratory Practice in Tropical Countries, Part 2 (2nd ed.). Cambridge University Press.
- Sanders, E. R. (2012). Aseptic laboratory techniques: plating methods. Journal of Visualized Experiments, (63), e3064. https://doi.org/10.3791/3064
- Mahon, C. R., Lehman, D. C., & Manuselis, G. (2018). Textbook of Diagnostic Microbiology (6th ed.). Elsevier.
Frequently Asked Questions
What is the difference between an inoculating loop and an inoculating needle?
An inoculating loop has a circular wire end and is used for surface transfers: streak plates, smear preparation, and broth inoculation. An inoculating needle has a straight wire end and is used for depth inoculation: stabbing semi-solid media such as SIM, TSI butt, gelatin, and motility media. The rule is: loop for surface, needle for depth.
Why must the inoculating loop be cooled before touching the specimen or agar?
After flaming to red heat (above 800°C), the loop is hot enough to kill bacteria on contact and melt agar on touch. Cooling for 15–30 seconds allows the wire to reach a safe temperature. You can test the loop by briefly touching the agar edge away from any growth, if the agar crackles or the loop hisses, wait longer before proceeding.
Why are disposable plastic loops preferred for handling infectious specimens?
Flaming a metal loop that carries infectious material generates aerosols, fine droplets containing viable organisms that become airborne. Disposable plastic loops are pre-sterilized and discarded after a single use, eliminating both the aerosol risk from flaming and the need for a Bunsen burner. They are the preferred choice in BSL-2 and BSL-3 work and in anaerobic chambers where open flames are prohibited.
What is a calibrated loop and what is it used for?
A calibrated loop delivers a precise, defined volume of liquid (either 1 µL or 10 µL) rather than an approximate loopful. In clinical microbiology, calibrated loops are used for semi-quantitative urine culture: the loop delivers a known volume of urine onto a CLED plate, colonies are counted after 24 hours of incubation, and the count is multiplied by the dilution factor to estimate CFU/mL. Significant bacteriuria is defined as ≥10⁵ CFU/mL. For full details on the urine culture procedure, see the Laboratory Diagnosis of UTI article.
What is the most common error when using an inoculating loop for a streak plate?
Why is nichrome wire preferred over platinum for routine laboratory loops?
Nichrome wire (a nickel-chromium alloy) heats and cools rapidly, is resistant to corrosion, and costs significantly less than platinum, typically 10 to 20 times cheaper. It is durable enough for repeated flaming in routine bacteriology. Platinum wire is reserved for specialized applications where its superior acid resistance or longer working life under extreme conditions justifies the higher cost.

Tankeshwar Acharya, MSc (Medical Microbiology)
Tankeshwar Acharya is an Assistant Professor in the Department of Microbiology at Patan Academy of Health Sciences (PAHS), Nepal, where he has been teaching and practicing clinical microbiology for over 14 years. He is the founder of Microbe Online, one of the leading free microbiology education resources on the web, covering bacteriology, mycology, parasitology, immunology, and clinical laboratory diagnostics written from direct experience in both the classroom and the diagnostic laboratory.
Comments
No comments yet. Be the first to share your thoughts.
Leave a comment
All comments are reviewed before they appear.